|
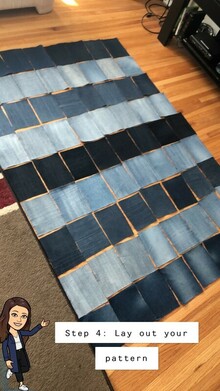
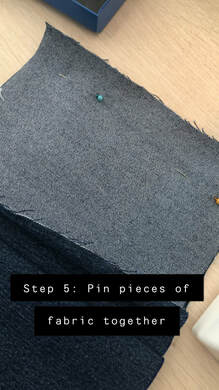
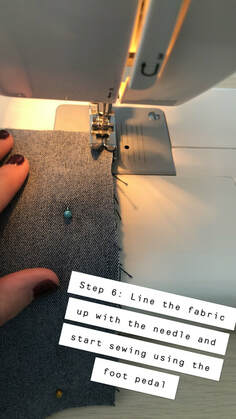
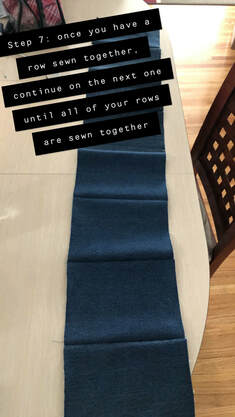
I finally got my sewing machine working this week and started sewing together my jean squares for my blanket. This took me way too many hours, I kept running into problems. I can confidently say, "I think I got the hang of it" by the end of the day. I pulled out my sewing machine and the manual and began setting up my sewing machine for work. Everything was working out fine, until I got to the part about a bobbin. A) What is a bobbin B) I don't have a bobbin and C) Where does the bobbin go and how is it used. I searched the manual from cover to cover and it gave me little to no information on the bobbin. So I resorted to Google and Youtube. I found out what a bobbin is and I linked it in case you are curious. And then I watched this video on how to insert a bobbin into the machine (SUPER helpful). So I ran out to Walmart (AGAIN - I've done probably 4 different trips already this week). I bought some plastic bobbins. And then followed the instructions of the video to put it into the machine. Finally, things were starting to come together. Things were moving slow when I first started and I was having trouble with how much space to leave between my seam and the edge of the square. This video was super helpful in giving me the right dimensions and providing me with a visual on how I should be doing it. Once I finally started to get the hang of it, things were moving at a nice pace, but a new problem occurred. I found my main thread kept pulling out of the needle. It was very odd because it wouldn't happen all the time, just at random times. And I wouldn't even notice it until I started doing my next square and no thread would come out. I have just learnt to deal with it as I really don't know what I can do to stop it - I guess just have to keep a better eye on it while sewing. I googles it, but did not get any helpful responses. If anyone knows how to avoid that, feel free to let me know! After all these minor inconveniences, everything went smoothly and I was able to get three rows of my blanket done. I stopped after three because I was tired since I had been at this for multiple hours. But at least when I am ready to pick it back up this weekend, it should flow a lot faster. Continuing with one of my other posts, I have shown you each step I do. So The last thing I did previous to this week was Step 3: Ironing the squares. This week was Step 4: Lay out my pattern, Step 5: Pin squares/fabric together, Step 6: Line the fabric up with the needle and sew it by using the foot pedal and Step 7: Once a row was sewn together, continue on to the next way until all the rows are sewn together. Pictures are provided below for a visual on my steps. Also I have taken a time lapse video of me sewing a square - it is a little faster than I thought it would be so I may need to figure out a way to slow it down so you can see it a little better! I will try to put one up next week so you all can take a look at the process! Overall, I am super proud of my progress so far and I am very excited to see it all come together.
1 Comment
Jayden Lang
3/20/2019 07:11:02 pm
Hey Hilary, Leave a Reply. |
AuthorHillary Mercier is a 4th Year Student at the University of Regina. She is currently studying to be a High School English teacher. Archives
April 2019
Categories |
 RSS Feed
